Getting started in surface design Part 2 –
Colour and the printing process
Welcome to part 2 in this series on getting started in the world of surface design. (You can find the first part here – it’s about getting your image files ready for printing). Designing your very own pattern and then seeing it in real life for the first time is a fabulous thrill. Seeing it made up into a piece of clothing or printed onto a laptop case is something else again!
For me, colour is an incredibly important element of any design. It is one of the first things that we register when we see anything, and can have a enormous impact on whether we like something or not. A change in colour can alter the whole mood of a finished piece. If you want a result that is vibrant and fun, seeing a design that you’ve worked so hard on printed in colours that are muted and dull can be very disappointing.

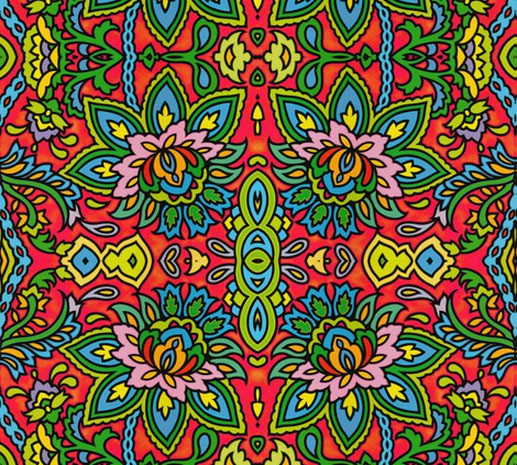
whimzwhirled – paisley pop
{read more about whimzwhirled and her designs here}
WORKING WITH COLOUR
There can be a massive difference between what you see on the screen, and what you get on the fabric. Variations occur because you’re working with different things – light on a computer screen is not the same as ink on a surface.
There are two ways of making colour, depending on whether the colour is made up of light, or whether it’s something printed onto a physical surface. RGB colour refers to Red, Green, Blue, and this is used to create colours in light; it is perfect for images on screen. CMYK (Cyan, Magenta, Yellow, black – yes there’s a crazy history as to why it’s K) is used to create colours in printing. Your image-editing program will give you a choice of using either of these (there’s probably a few other options as well, but don’t worry about them at this stage). It’s generally the best practice to use RGB on your screen, as it gives a truer picture of the colours in your finished design. Printing venues are usually accommodating of whichever system you use, and will convert your file to CMYK before printing.
The next most important factor in getting the colour right is knowing that different surfaces will have a big impact on the finished product. Depending on the weight of your fabric, colours can be more or less vibrant (a thin voile is more translucent and will look less vibrant, whereas a heavy cotton is more opaque and can hold more ink resulting in richer colour). Paper is opaque and flat, and colours tend to be even more vibrant. The colour of the surface will affect the result – if it is off-white or creamy, the print will likewise be skewed that way. The types of ink used can also affect the result.
Finally, remember that on-screen colour varies from monitor to monitor. Your monitor may or may not have good colour reproduction, and it may look quite different from another screen, and VERY different from a printed surface.
For all these reasons it is highly recommended that you get yourself a colour chart, printed on the material of your choice, from the printer you intend to use. These are usually printed as a grid of squares, each with its own code (for instance, a Hex code in the format #ffffff) to ensure accurate colour reproduction. There are other colour systems (e.g. Photoshop includes Pantone references), but it doesn’t really matter which system you use as long as you are consistent. Choose your colours from your printed colour chart, and feed those codes into your digital file. (as discussed above, this may mean that your image on screen may not appear to have the ‘correct’ colours!) Finally, you might like to order a test swatch if you can, to physically check the colours in your design before spending oodles of cash on yardage that is just not right.
(If you want more information on how colours work together at a design level, I’ve written about colour as a design element here.)
ONLINE VENUES FOR PRINTING
There are a few avenues for you to choose from when you are ready to test the waters with your first design. They vary in structure slightly, and are open to anyone.
Spoonflower is probably the best known, and is structured so you can set up your own shopfront and make your designs available publicly, and you earn a commission on yardage sold. They have a good amount of information about the printing process and what to expect, but they do emphasise that that their process is substantially automated, and therefore the responsibility is on you to ensure that the file you upload is absolutely correct.
FabricOnDemand doesn’t have the option of a shopfront, but they do offer a much wider range of basecloths (currently 19 different fabrics including 5 weights of cotton as well as 100% linen and silk). Unfortunately their system doesn’t allow you to preview your design after you’ve uploaded it like Spoonflower does, but they do give you the option of adding in any comments or special requests when you order, and they will also email you a proof of your printed design for your approval before printing. They have an excellent FAQ page, and are more than happy to talk to their customers about special requests.
DigitalFabrics are an Australian company based in Sydney, and print on a wide range of polyester-based fabrics to achieve consistent results. They will also print on fabric that you supply, as long as it has a high polyester content to ensure good colour reproduction. Like FabricOnDemand their system doesn’t allow for you to preview your design, but they do have some very good tutorials on how to create repeats in Photoshop and Illustator.
Libertypress is a site based in the UK that I have only recently come across. They offer a few different types of finished goods as well as paper and a variety of fabrics, including various weights of silk, cotton and Belgian linen.
Society6 is another site that allows you to set up your own shopfront. However, it doesn’t print your design onto yardage but instead offers finished products – clothing, tote bags, throw pillows, iPhone and laptop cases and more. It is used by designers of repeats, as well as more illustrative work.
Now off you go, and have fun!
In the next post I will be discussing what happens when you decide to get a bit more serious. Where do you go to learn more? Who do you approach to sell your designs? (And if you want to go back and check the basics, Part 1 of this series is here.)
In the mean time, I would love to hear your questions and comments about colour, and getting your work printed through online venues. If you’ve tried any of the above venues, what have been your experiences, good AND bad? If you’d had problems, have they been sorted quickly?
Cheers, Julie 🙂

very nice color and printing design…….
Thank you!