Repeating Patterns : tutorial by Sew Heidi
Repeating patterns in Illustrator used to be a very manual process and more than a little bit frustrating. With the introduction of the Pattern Making Tool in CS6 (if you’re in CS5 or earlier, you won’t have access to this feature), patterns became simple to make and included amazing features such as live preview and half drops.
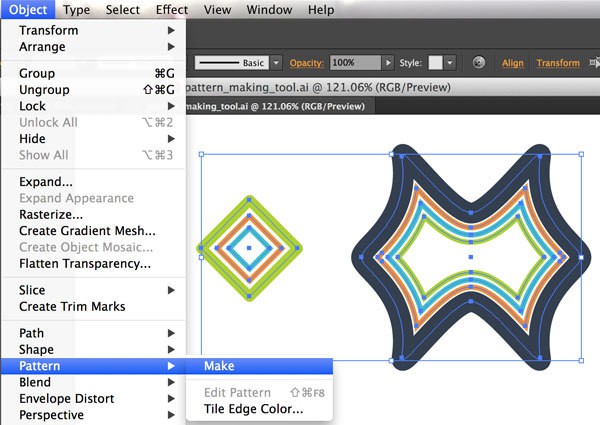
To make a pattern, start with an assortment of motifs that you want to use. Select those motifs with the Selection Tool and choose Object > Pattern > Make.
Upon choosing Object > Pattern > Make, 3 things will happen:
A dialog box will appear (unless you have done this before and previously checked “Don’t Show Again”). This dialog essentially says that you have created a new pattern swatch, and that any changes you make to the artwork will be applied to the swatch until you exit Pattern Editing Mode (see #2). Click OK.
You will enter into Pattern Editing Mode (if you are familiar with Isolation Mode, this is similar to that). This means that you are working inside a pattern, making edits to it. You will know you are in this mode because of the info along the top of the document (and all other artwork besides the objects in your pattern will not be visible or editable).
The Pattern Options panel will open (#3). There are some basic features in here we’ll cover shortly.
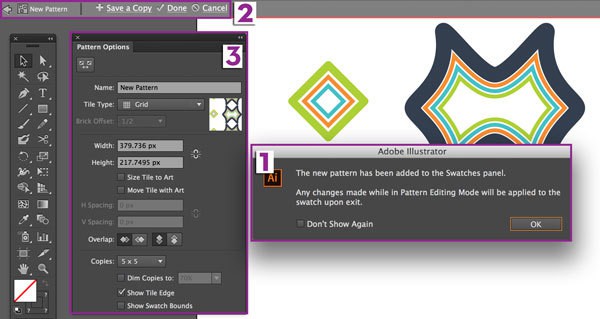
Your pattern will now be shown in repeat, giving you a preview of what it will look like. Depending on settings, you may have fewer or more tiles and they may look dimmed or not. We’ll go over those settings shortly, but for now you should see some sort of repeat.
Now let’s review some of the tools and settings in the Pattern Options panel.
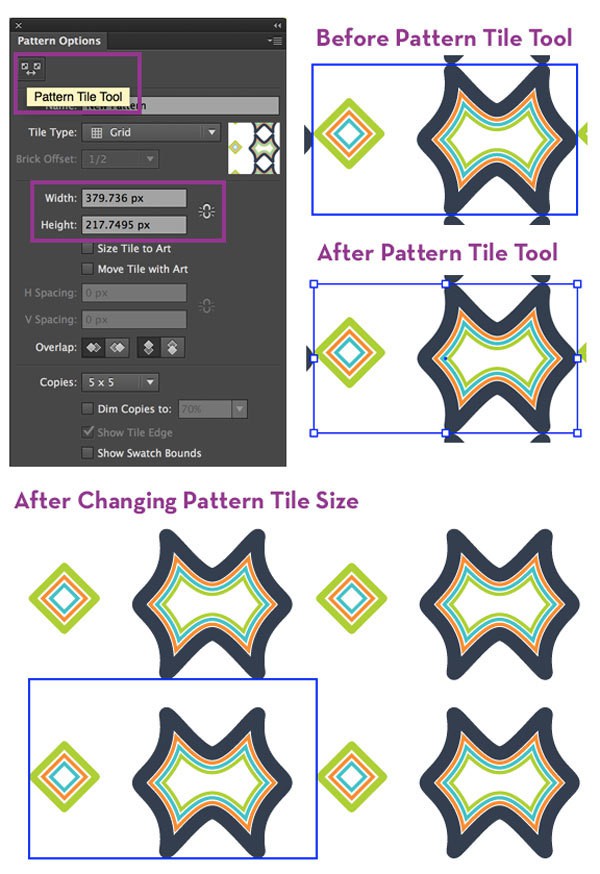
Pattern Tile Tool: Click this to manually change the pattern tile size (the single tile of artwork that repeats to create the pattern). You will notice the box around the pattern tile (blue) will change to look like a bounding box which you can manually drag to resize (occasionally the Pattern Tile Tool is buggy and gets stuck, not allowing for resizing – if this happens, you can input measurements in the Width/Height fields in the Pattern Options panel). Once you are done editing the tile size, click the Pattern Tile Tool again or switch to any other tool on the main Illustrator Tool Bar.
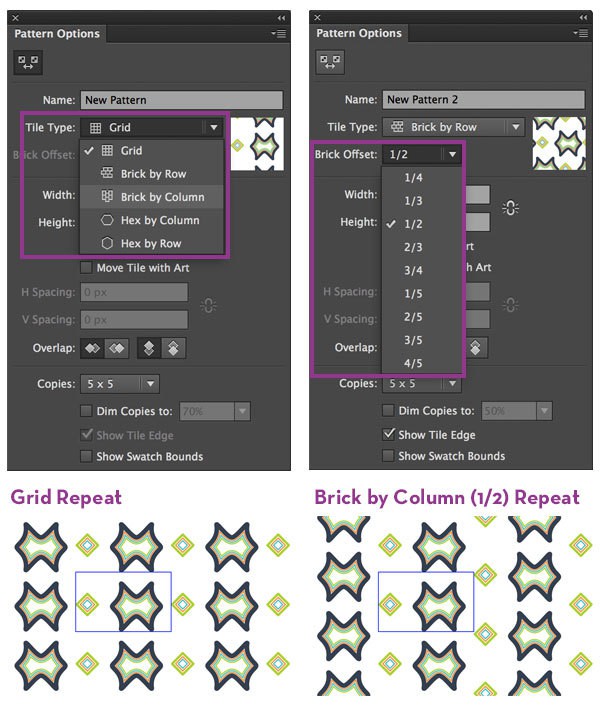
Tile Type: By default this will be set to Grid (also known as a straight repeat) where the tiles repeat in a grid. Click through these to see how different tile types change your pattern. The most common besides Grid is Brick by Column (also known as a half drop). NOTE: If you choose a Brick by Column or Row, you can choose what the offset is. Default is 1/2, meaning each repeating tile is offset by half.
Copies: This controls how many copies of the pattern you will preview. If your repeat is really large, you may want to set this to a smaller number, and if your repeat is really small, a larger number may work best.
Dim Copies to: This is a setting I frequently turn on and off. Dimming copies can be very helpful when manipulating artwork so you can see which motifs are copies and which are the actual editable motifs, but previewing the repeat may be best done with this turned off so you can see the artwork in full opacity.
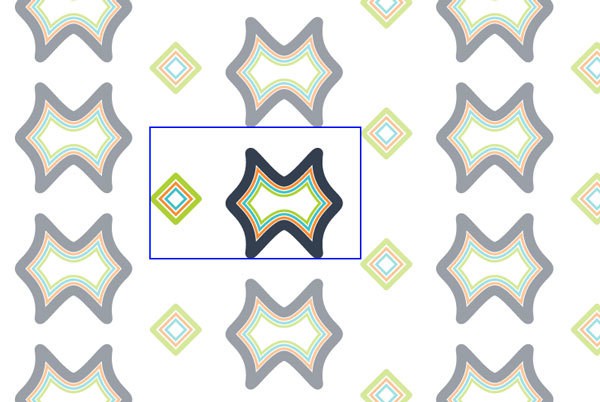
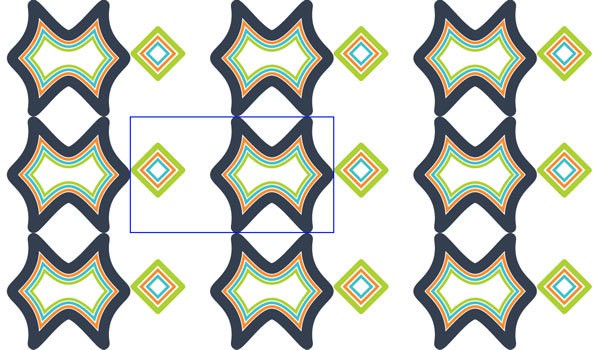
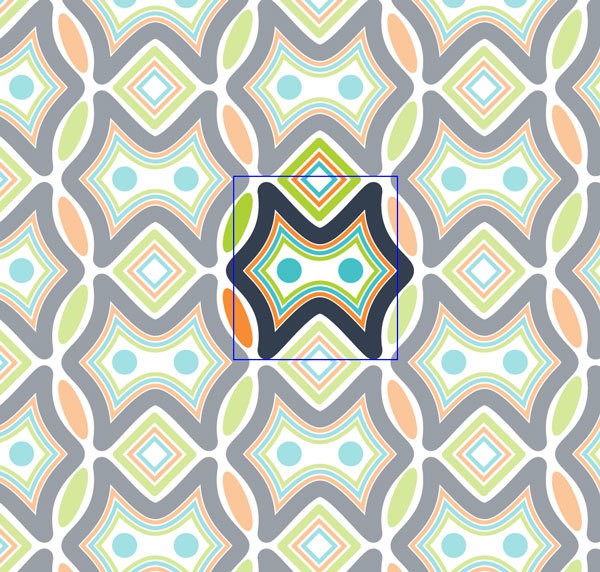
Now that we’ve gone through all the basic settings, play around with your pattern. I’ve added some more motifs (you can use tools and edit artwork inside Pattern Editing Mode just like you would work normally in AI) and adjusted the tile size to create a nice repeat.
NOTE: You cannot use a pattern within a pattern. If you try to create a pattern with an object that has a pattern, you will get a dialog box advising this cannot be done. To get around this, you can add an object with a pattern while inside Pattern Editing Mode, but understand that the pattern will be expanded within the artwork. Complex visual attributes such as pattern brushes and effects will also be expanded if used inside of a pattern. A dialog box warning you about this will appear upon exiting Pattern Editing Mode.
Once your pattern looks good (don’t worry you can always go back and edit it), you can exit Pattern Editing Mode one of 4 ways.
Click “Done” in the top left corner of the document
Click the arrow in the top left corner of the document
Double click anywhere except directly on an object (careful not to do this accidentally while you’re editing, or else you’ll have to re-enter Pattern Editing Mode)
Hit Esc on your keyboard
![]()
Upon exiting, you’ll be taken back to your Artboard where your original motifs will look the same as they did before making your pattern, and you’ll notice your swatch has been added to the Swatches panel.
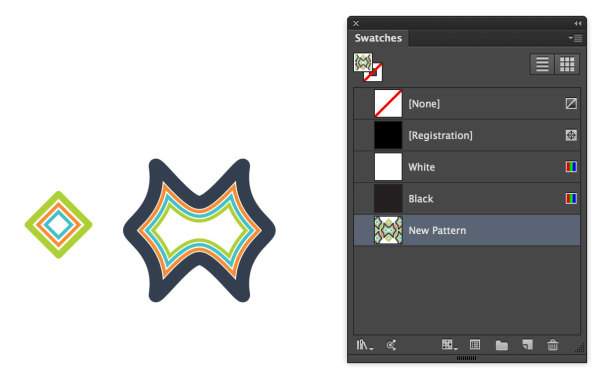
You can now use the swatch like any other swatch within your artwork.
If you want to edit the pattern, double click on the swatch thumbnail from the Swatches panel. This will put you back into Pattern Editing Mode where you can make any changes. NOTE: Changes made to this pattern swatch will affect all instances of the swatch in your artwork. If you want to make a new swatch, duplicate it and edit the copy.
Much easier than doing it manually, the Pattern Making Tool released in Adobe Illustrator CS6 will allow you to focus more on making awesome designs and less on fussing over repeats. Enjoy!
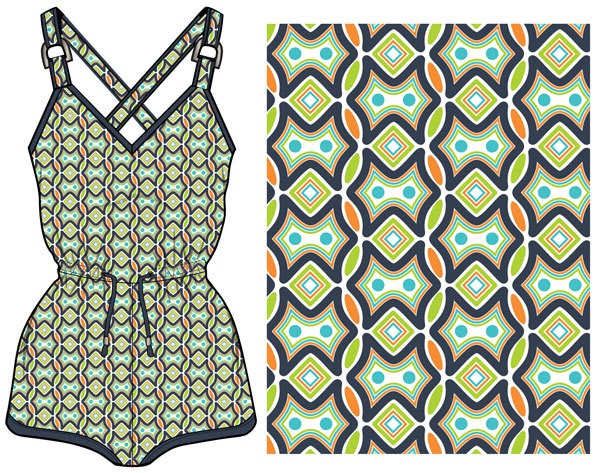
Repeating pattern artwork & romper illustration compliments of Illustrator Stuff.
+++++
Sew Heidi is a fashion tech evangelista focused on using Illustrator for fashion. She also is co-founder of Illustrator Stuff, an online marketplace for vector fashion flats, repeating patterns and more.